Let me just tell you.... These little stuffed pasta shells are the bomb! Sausage, Bacon, Cheese, Pasta......Kissed with a bit of smoke. This will surely be a crowd pleaser!

First of all we need to chat about the which pasta to get. Cannelloni or Manicotti? Here's the differences:
CANNELLONI (not those little dessert pastry puffs filled with a sweet cream, Cannoli)
Baked cannelloni is a favorite in many Italian-American restaurants, and is well known as a cylindrical pasta, stuffed, smothered in sauce, and baked. If you have ever made a cannelloni dish at home, you probably purchased the tubular pasta from a grocery store, cooked them, and tediously inserted filling before adding sauce over the top.
In contrast, traditional cannelloni is prepared from a rectangular piece of pasta. After cooking the rectangular pieces, and adding a few tablespoons of filling to the top, you simply roll the pasta into the desired tube, add the topping, and bake. If you would prefer preparing your cannelloni dishes using flat pasta instead of tubes, some chefs recommend trying your recipes using flat lasagna noodles.
MANICOTTI
Manicotti is well known in the United States as a tubular pasta usually served stuffed and baked, similar to cannelloni. The noodles are cooked, stuffed, and covered in sauce in almost the exact same way. Manicotti pasta is also sometimes sold in stores as shells instead of tubes, which can make stuffing them somewhat easier.
However, traditional manicotti is not actually a pasta. Authentic manicotti is made with crepes, not pasta, that are filled and baked. The thin crepes required for what in the United States is known as manicotti must even be made differently, in crepe pans (rather similar to the pans used to make tortillas). In Italy, manicotti would not be served as a pasta dish but as a crepe dish, or a crespelle.
Still confused?? Just head over to the grocery store and choose a tube like pasta! Either one will work in this case. Tip: Try to find the pasta with a straight cut on the end and not a angled cut. You'll want 10-12 shells.
The Filling
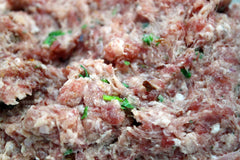
You will need 1# of ground meat. The most popular filling is hot Italian sausage. But don't limit your self, you can use a ground beef with spices or herbs mixed with onions and peppers. It's really up to you. Doesn't a meatloaf blend sound awesome!
You will also need about 8oz of cheese that is cut small enough to put into the pasta tube. You can experiment with Cheddar, Pepper Jack, even those little mozzarella balls!


How to Stuff the Shells
Take your uncooked ingredients and layer them in the shell. I like to have the meat on both outer ends. This seems to help keep everything inside the tube as it cooks.

Bacon Wrapped
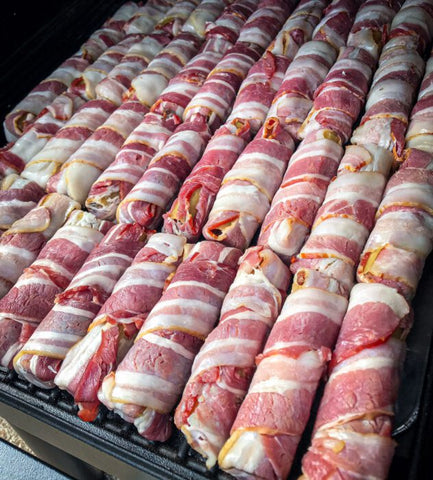
You will need 1# of bacon. I like to use a hardwood smoked bacon that is on the thin side. It is easier to work with when it is thin. Start by using one piece of bacon and wrap it along the long way of the tube. This will help to keep the stuffing inside the tube as it cooks.
Then take a second piece of bacon and roll it around the tube like a spiral. See img.

Prepare it for Smoking/Grilling
While your Smoker or Grill is coming up to 225 degrees, you will need to rub the outside of the bacon wrapped shells. I like to use a neutral rub something that will compliment the filling inside. If I go with a meatloaf style, I would prefer Humphrey's Bovine Rub or I use Humphrey's Jivin' Hive when working with pork sausage.
Rub the outside of each bacon wrapped tube and set it on a wire grid so that it will get smoke and heat on all sides. Tip: place the side with the bacon ends down on the rack so that it holds them in place while cooking.

In the Smoker
Place them in the smoker that is preheated to 225°F or on your grill using indirect heat and cook for approximately 2 hours. The pasta shell should be tender and the when probed the stuffing should be a min. of 165°F.
Remove them from the smoker and glaze with your favorite sauce. I personally like Smokin Hoggz Pitmaster Sauce on everything!
Cut some cheddar cheese slices into thirds. Wrap one end of the glazed tubes with the cheese and set it back on the smoker for 10 minutes until the sauce sets and the cheese melts into shape.
Remove from the smoker and allow to cool slightly and the cheese to set!
Serve with a side of BBQ Sauce.

Thank you for the inspiration and images: https://www.bbq-idee.nl/, https://www.westwood-bbq.de/ https://www.grillsportverein.de/

